![]()
INTEGRATING SCIENCE, TECHNOLOGY, ENGINEERING AND MATHEMATICS (STEM) INTO THE HOME ENVIRONMENT
Pedometer
ENGINEERING TASK
Design a wearable pedometer prototype that will track children’s number of steps.
Task adapted from Teach Engineering STEM curriculum developed at the University of Colorado.
LET’S START WITH A FIGURE!
What do you notice?

FIGURE SUPPORT
Optional questions to ask:
- What is obesity? Why is being obese considered a health issue?
- What do you think are things that contribute to obesity?
- What patterns do you notice? For example, what do you notice about states in the south? Which states have a percentage between 9.8-14.0? Why do you think this is the case?
- This data is from 2019. Do you think this percentage has increased, decreased, or remained the same?
ENGINEERING TASK
 To prevent obesity, it is recommended that all children between the ages of 5 and 19 should take around 12,000 steps a day. (What does this mean for the number of steps you take in one week? What about one year?) Your task is to design a wearable pedometer prototype that will track children’s number of steps. (How might this help with childhood obesity?)
MATERIALS IN KIT
- Micro:bit Kit
- Scissors
- Fabric & Felt Pieces
- Measuring Tape
- Velcro Dots
- Binder Clips
- Nylon Strap
- 2 Pipe Cleaners
- Ribbon
- Sewing Kit
- Duct Tape
- Tacky or Fabric Glue
- Psst: Consider how to use items in your home like a cereal box.
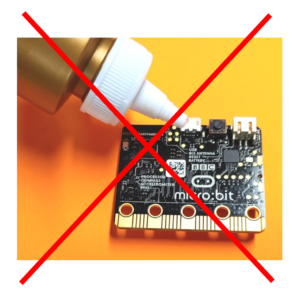
WARNING! WARNING!
What do you think will happen to the micro:bit if you use glue to get it to stick to other material in the kit or in your home? Correct. So please do not use glue on the micro:bit.
STEP 1—RESEARCH
Pedometer? A pedometer is a gadget that counts each step you take. But how does it work? Where might pedometers be worn on your body? How are they worn (e.g., Tied? Clipped? Strapped?) What are the different types of pedometers? What are the advantages and disadvantages? These are questions you want to consider before you start thinking about your pedometer design!
STEP 1—SUPPORT
Optional questions to ask:
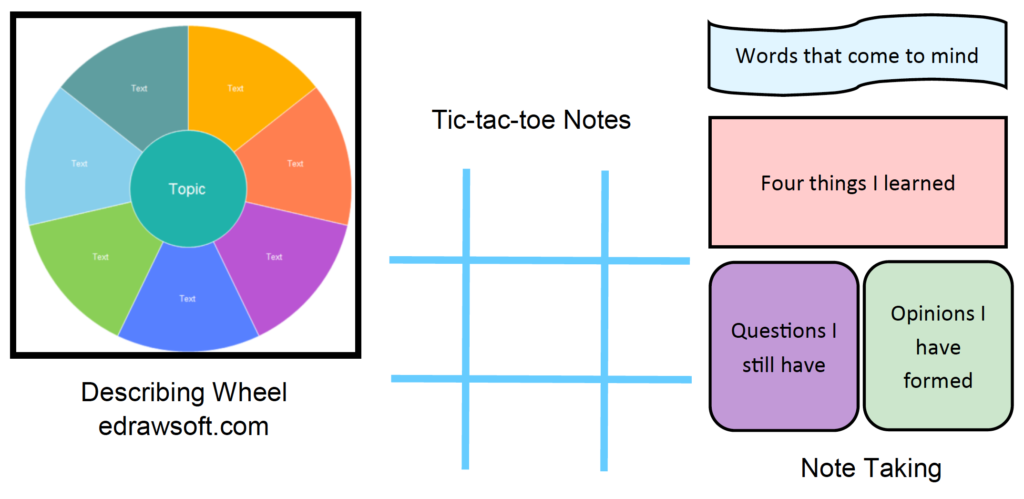
- How might we document and organize what we learn from our research? (See examples on next page, but you may want to develop a graphic organizer together.)
- Have you used a pedometer at school? Tell me about it. (Share your experience and/or knowledge of a pedometer if applicable).
- Are pedometers accurate? Why or why not? How might this impact our prototype?
- I really like ______ (i.e., part of sketch). It is a unique feature. What made you think of that idea?
STEP 1—GRAPHIC ORGANIZERS
DID YOU KNOW…?
Modern pedometers interact with devices such as smartphones and Fitbits. However, your customers are children between the ages 5-19. How many five-year old children own a phone? Also, the average cost for a smartphone is about $580. WOW! One last fact for you to keep in mind. About 42 million Americans do not have access to the internet, so you cannot rely on wi-fi for the prototype.
STEP 2—PLAN
Brainstorm and sketch at least 2 designs. Here are a few questions to think about in your design.
1. Where is the pedometer to be worn?
2. Should it be adjustable?
3. How might you make it comfortable? Stylish?
4. How can you make it suitable for daily activities such as running and jumping?
5. Why might the size of the micro:bit be an important part of your design?
For each design, make a list of material you will use in your prototype.
MEET THE MICRO:BIT

Watch this video to learn more about a micro:bit and the online interface.
https://youtu.be/u2u7UJSRuko
MEET THE MICRO:BIT—SUPPORT
Optional questions to ask:
- What did you learn about micro:bits?
- The video a micro:bit is a tiny pocket-sized computer. What are some of the things you think a micro:bit can do? Let’s make a list and revisit this list later.
- Let’s search for the different feature talked about in the video on our micro:bit.
- What questions might you still have? How can we find the answer?
STEP 3—CREATE
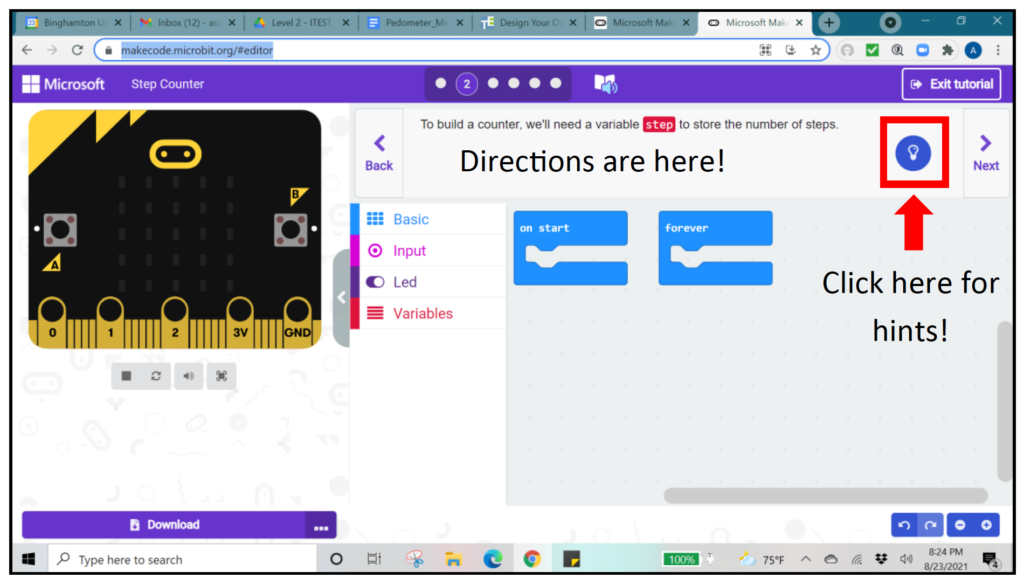
To begin your prototype, let’s program your micro:bit. The following website will walk you through this process.
https://makecode.microbit.org/
Open “step counter” under the heading “Fashion.”
If you are asking yourself, “Did I find the right project?”, look at the next page.
STEP 3—CREATE
 Now, you might be asking yourself, “How do I download my program?” Or “What is this battery pack for?”
Let’s watch a video:
How would you explain this to a six-year old, or a sixty year old?
STEP 3—CREATE

Use materials from the kit, or your home, to create a wearable pedometer. Refer back to your plans as needed.
STEP 3—SUPPORT
Optional questions to ask:
- I have a game to play. Find one item, material, or tool that we might use in our prototype for each letter: O S P C W. For example, for P, maybe we find pom-poms to add to our design.
- How might we use _____ (name specific item, material, tool) in our prototype?
- How well does the prototype match our original design/sketch? Tell me why.
- How can we make sure the micro:bit does not fall off?
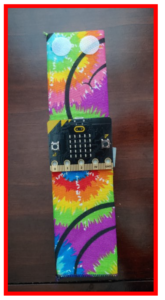
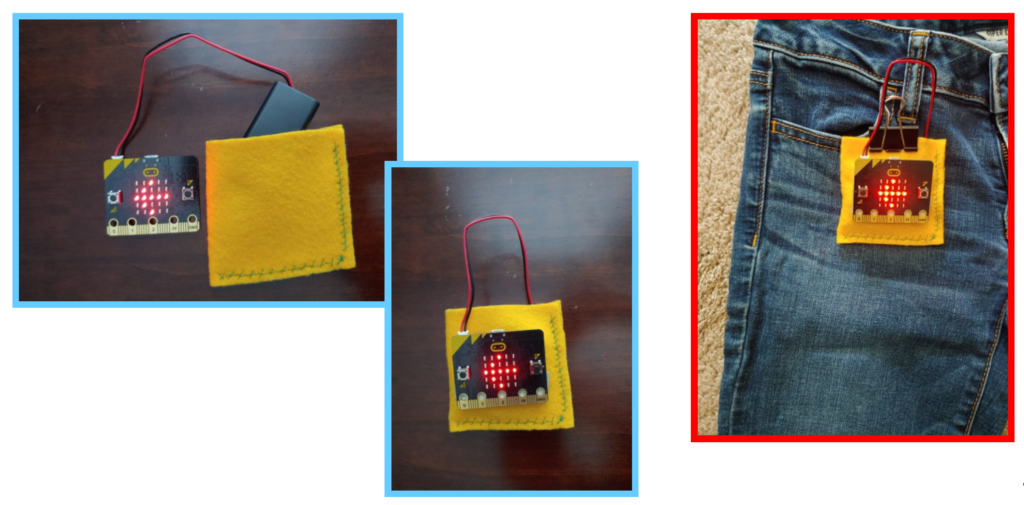
EXAMPLE 1
PSST! Speaking from experience, be careful where you place the Velcro dots. Where do you think the other side of the Velcro dots are located in this design?

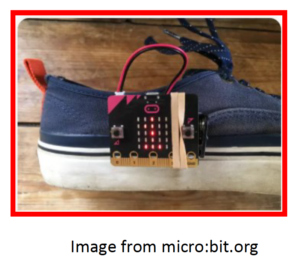
EXAMPLE 2
STEP 4—PREP FOR TEST FEEDBACK
 Product engineers determine how well potential customers like their product. Develop 4-5 questions to ask “customers” about your prototype. Think about how it works (functionality), comfort, and style.
STEP 4—SUPPORT
Introducing the Pedometer—Optional questions to ask:
- How will you introduce your pedometer to your customer? What does it do?
- What do you expect your customers to do (walk, jump, go upstairs, run)?
Developing Interview Questions—Optional questions to ask:
- What question will you ask to know their first impression about your pedometer?
- How will you know which part of the prototype your customer likes or not?
- How will you know what improvements your customer wishes to make?
STEP 4—TEST
Test your prototype with 2-3 “customers” between the ages 5-19. Psst. Don’t forget to interview and get feedback from your customers. You might want to take notes because our short-term memory lasts between 15-30 seconds.
STEP 5—IMPROVE
What feedback did you hear and/or observe? Based on the feedback from your tests and your customers, how would you rate your prototype?
How will you improve the prototype? Why? Make changes to your prototype and test again. This is what is referred to as an iteration.
COMMUNICATE
Engineers have to be able to talk about their process and their prototype to a wider audience. Create a commercial to sale your prototype.
- Start with a catchy story.
- Describe how your product is a solution.
- Show how the product works.
- Include a testimonial from someone else (e.g., parent, friend) about how great the product is.
BE CREATIVE!
STEP 6—EXTENSION
![]()
Adapt your prototype for another use, like a watch. Play around with the different tutorials on the micro:bit website for additional ideas.
Be creative!!!
STEP 7—EXPLORATION
CREATE YOUR OWN!!
Play around with the different tutorials to learn more about block programming with the micro:bit. Once you feel comfortable, we challenge you to develop your own programming project for us to share with others.
DID YOU KNOW…

Ada Lovelace, born in 1815, is often referred to as the world’s first computer programmer. She published the first algorithm designed for a machine, a century before the first computer was created.
Are you interested in meeting current women engineering? Check out this website—https://www.engineergirl.org/3/Engineers.
WHAT TYPE OF ENGINEER ARE YOU?
Add a sticker to your Engineering Passport that identifies the type of engineer you were most like in the design of a pedometer prototype. Don’t forget to write why you chose the type of engineer.