ENGINEERING TASK
You want a way to secretly and safely share objects with your friend who lives next door. You choose to design a prototype that will deliver an object at least 6 feet.
DID YOU KNOW…?
In August 2020, Amazon got a “yes” to deliver packages by a drone. A drone is a flying object with no human pilot, but controlled remotely by a user or computer program.
- Ziploc bag of pasta
- 10 pipe cleaners
- 10 Paper clips
- 10 rubber bands
- 10 wooden dowels
- 10 large popsicle sticks
- 10 straws
- ~3 feet of yarn
MATERIALS IN KIT
- 6 fabric softener sheets
- 6 sandwich bags
- Fishing wire
- Scissors
- Electrical tape
- Hot glue gun & 2 sticks
STEP 1—RESEARCH
Let’s consider some of the different types of delivery options and how they work. A zipline? A wind-powered car? A catapult? An airplane? A bird? Superman?
Here are some links to information to get you started in your research. What do you notice that might be helpful in designing a solution for your task? Remember to take notes and feel free to explore other delivery options.
- How do ziplines work?
- How does a car run by wind power?
- What things should be considered when designing an airplane?
- How does a trebuchet, a special kind of catapult, work?
STEP 2—PLAN
What will you deliver? How will you deliver it? Draw two detailed designs or sketches for your delivery system. How did your research inform your designs? Keep in mind the size, weight, and shape of your object to deliver.
MATERIALS IN HOME—BINGO STYLE
Now that you have two designs, let’s find materials around your home to make it happen. As a family, work together to find items to complete the bingo card on the next page. As you search for objects, think what kind of parts do __ (e.g., cars) have?
| Paper-based item | Something that is round or a cylinder but as many of this item as you want. | Something that is flat and sturdy |
| Random items from a “junk” drawer or recycle bin | FREE SPACE (anything that will help you innovate) | Food container of any kind |
| Something that will help keep things together | Something that clips | Something that adds personality |
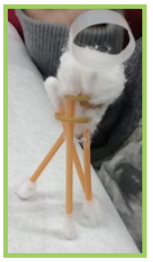
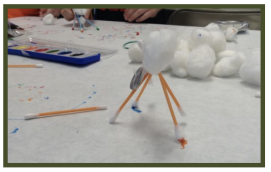
STEP 3—CREATE
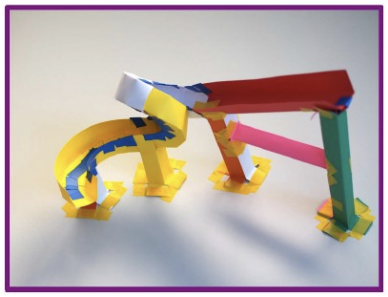
Pick one of your designs from Step 2 and build a prototype.
What are the wheels on this car?
What could that paper airplane deliver?
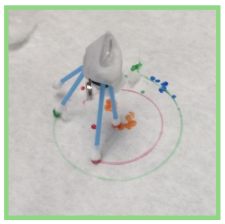
STEP 4—TEST
Now that you have built your prototype, it’s time to test. (Psst. Some wise person, William Whewell, said, “Every failure is a step to success.”) Document or write down your failures…and celebrate your successes.
STEP 5—IMPROVE
Li Keqiang
“Changes call for innovation,and innovation leads to progress.”
As a family of engineers, discuss the following: What are three ways you can improve upon your prototype? How are these based on the results from your testing step?
DID YOU KNOW…?
Bubble wrap was crated in 1960 in an attempt to create a trendy new textured wallpaper. Oops! IBM was the first to use bubble wrap to package and transport a computer. Some adults use Legos as a prototyping resource. You know, those toys that kids play with? It took 36 prototypes to create Wheaties, a popular breakfast cereal. Yes, development of a new food item is prototyped just like your prototype of a friendly delivery system.
EXTENSION
“Don’t limit your challenges. Challenge your limits” (Anonymous). Are you up for a challenge?
- Deliver an object further than 6 feet. 10 feet? 12 feet? 20 feet?
- Complete a delivery with an obstacle in the way (e.g., chair)
- Deliver additional objects. How much weight can your prototype hold?
- Build a different container. What shape of the container can hold the most weight?
- Complete a delivery in a time faster than your first prototype.
DID YOU KNOW…?
Mechanical engineers research, design, develop, build, and test mechanical devices, including tools, engines, and machines. Jobs for mechanical engineers are projected to grow 4% from 2019 to 2029 and considered to be one of the most popular engineering fields. But in the year 2018, only about 15% of Bachelor degrees in mechanical engineering were awarded to women.