INTEGRATING SCIENCE, TECHNOLOGY, ENGINEERING AND MATHEMATICS (STEM) INTO THE HOME ENVIRONMENT

Animal House

ENGINEERING TASK

It is challenging for stray animals to survive extreme weather conditions. Your task is to design a prototype of an animal house that will help stray animals survive extreme weather conditions common to where you live—rain storms, really hot and really cold temperatures, earthquakes, or tornados.

DID YOU KNOW…?

  • Only 1 out of every 10 dogs born will find a permanent home.
  • The main reasons animals are in shelters: owners give them up, or animal control finds them on the street.
  • Many strays are lost pets that were not kept properly indoors or provided with identification.
  • It’s impossible to determine how many stray dogs and cats Iive in the United States. Estimates for cats alone range up to 70 million.
  • Source: dosomething.org

MATERIALS IN KIT

  • 20 Popsicle sticks
  • 10 Aluminum foil sheets
  • 30 Cotton balls
  • 1 Deck of playing cards
  • 4-5 Felt pieces
  • 15 Thumbtacks
  • Yarn
  • Scissors
  • Masking tape
  • Measuring tape
  • 2 Thermometers
  • Cardboard base 3

STEP 1—RESEARCH

What are the elements to keep an animal warm in winters and cool in summers? Think about wall isolation, roof design, and other feature that would make an animal house useful and offer protections against other weather conditions. Here are some videos to get you started and be sure to take notes about what you notice and might use in

your own design.
https://youtu.be/d6xLYlg8qm8
https://youtu.be/0anNT4yVH08
https://youtu.be/9HH9HsP1TPI


STEP 2—PLAN


Based on your research, brainstorm and sketch 2-3 detailed designs of your animal house. List or label the materials you will use. You will build your house on a piece of cardboard.

How will the structure of the house withstand weather conditions where you live (e.g., wind, rain, snow)?

MATERIALS IN YOUR HOME
DID YOU KNOW…?


Newspapers can be used in your prototype as a form of structure and support. The key is to take one sheet of newspaper and roll it tightly from one corner to another.

MATERIALS IN YOUR HOME—
SCAVENGER HUNT

In addition to using materials from the kit, you can find items inside and outside your house that start with the letters below. Only one object per letter, but you can have more than one of that object. For example, for the letter L, you can use 30 leaves. Be strategic.
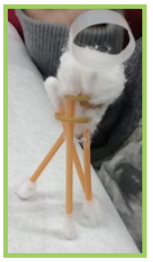
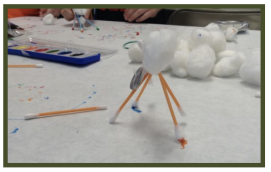

STEP 3—CREATE


Pick one of your designs
from Step 2 and build your prototype. You can only use materials in the kit and those you gathered from the scavenger hunt.


STEP 4—TEST (TEMPERATURE)

Place the animal house outside. Place one thermometer inside the animal house and the other thermometer outside the animal house. Read the temperature of both thermometers at least seven times over a 12-hour period. Document the time (in minutes) and temperatures in the table on the next page. Is the temperature inside the house more than, less than, or the same as the temperature outside the house? Why? How does the inside temperature reflect how you designed the animal house?

STEP 4—TEST (WIND)

Do you think your animal house can withstand a windstorm for 8 seconds? Why or why not? If it is a windy day, place your house outside to test. If it is not a windy day, use a hair dryer on full speed to simulate the windstorm.

STEP 4—TEST (RAIN/SNOW)

How well will the animal house withstand rain and/or snow? Pour water onto the roof of your house using a watering can. Wait! You don’t have a watering can? Let’s make one. Use a thumbtack to punch holes into a bottle cap.

STEP 5—REFLECT & IMPROVE


How would you rate your prototype on a five-star scale?

What things did you consider for your five-star rating?
What “tag line” captures your rating (e.g., “Built well. Animals of all kinds will enjoy.”)

What improvements would you make? Why? What did you learn from your testing results? How can we make these improvements with the materials that we have?

PARALLEL PROTOTYPE


Choose another design from Step 2, create another prototype and test it in the same manner. How would you rate this house? Why? Based on your tests, which house is more likely to withstand different weather conditions?

DID YOU KNOW…?

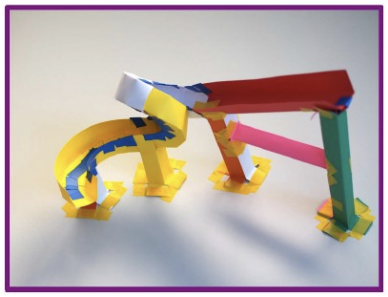
Structural engineers design the “bones and muscles” for man-made structures such a buildings, bridges, and tunnels. It is their responsibility to calculate the stability and strength for things such as snow, wind, and earthquake forces. Can you identify these famous building designs?

Friendly Delivery

ENGINEERING TASK

You want a way to secretly and safely share objects with your friend who lives next door. You choose to design a prototype that will deliver an object at least 6 feet.

DID YOU KNOW…?

In August 2020, Amazon got a “yes” to deliver packages by a drone. A drone is a flying object with no human pilot, but controlled remotely by a user or computer program.

  • Ziploc bag of pasta
  • 10 pipe cleaners
  • 10 Paper clips
  • 10 rubber bands
  • 10 wooden dowels
  • 10 large popsicle sticks
  • 10 straws
  • ~3 feet of yarn

MATERIALS IN KIT

  • 6 fabric softener sheets
  • 6 sandwich bags
  • Fishing wire
  • Scissors
  • Electrical tape
  • Hot glue gun & 2 sticks

STEP 1—RESEARCH

Let’s consider some of the different types of delivery options and how they work. A zipline? A wind-powered car? A catapult? An airplane? A bird? Superman?

Here are some links to information to get you started in your research. What do you notice that might be helpful in designing a solution for your task? Remember to take notes and feel free to explore other delivery options.

STEP 2—PLAN

What will you deliver? How will you deliver it? Draw two detailed designs or sketches for your delivery system. How did your research inform your designs? Keep in mind the size, weight, and shape of your object to deliver.

MATERIALS IN HOME—BINGO STYLE

Now that you have two designs, let’s find materials around your home to make it happen. As a family, work together to find items to complete the bingo card on the next page. As you search for objects, think what kind of parts do __ (e.g., cars) have?

Paper-based itemSomething that is round or a cylinder but as many of this item as you want.Something that is flat and sturdy
Random items from a “junk” drawer or recycle binFREE SPACE
(anything that will help you innovate)
Food container of any kind
Something that will help keep things togetherSomething that clipsSomething that adds personality

STEP 3—CREATE

Pick one of your designs from Step 2 and build a prototype.

What are the wheels on this car?

What could that paper airplane deliver?

STEP 4—TEST

Now that you have built your prototype, it’s time to test. (Psst. Some wise person, William Whewell, said, “Every failure is a step to success.”) Document or write down your failures…and celebrate your successes.

STEP 5—IMPROVE


“Changes call for innovation,and innovation leads to progress.”

Li Keqiang

As a family of engineers, discuss the following: What are three ways you can improve upon your prototype? How are these based on the results from your testing step?

DID YOU KNOW…?

Bubble wrap was crated in 1960 in an attempt to create a trendy new textured wallpaper. Oops! IBM was the first to use bubble wrap to package and transport a computer. Some adults use Legos as a prototyping resource. You know, those toys that kids play with? It took 36 prototypes to create Wheaties, a popular breakfast cereal. Yes, development of a new food item is prototyped just like your prototype of a friendly delivery system.

EXTENSION

“Don’t limit your challenges. Challenge your limits” (Anonymous). Are you up for a challenge?

  • Deliver an object further than 6 feet. 10 feet? 12 feet? 20 feet?
  • Complete a delivery with an obstacle in the way (e.g., chair)
  • Deliver additional objects. How much weight can your prototype hold?
  • Build a different container. What shape of the container can hold the most weight?
  • Complete a delivery in a time faster than your first prototype.

DID YOU KNOW…?

Mechanical engineers research, design, develop, build, and test mechanical devices, including tools, engines, and machines. Jobs for mechanical engineers are projected to grow 4% from 2019 to 2029 and considered to be one of the most popular engineering fields. But in the year 2018, only about 15% of Bachelor degrees in mechanical engineering were awarded to women.

DIY Grabbers

ENGINEERING TASK

Grabbers are handheld tools that can be used to retrieve items from a distance. Watch the following video for more information:

https://youtu.be/_gw6FlLANtA

Design a prototype of a grabber that can pick up three different objects from at least two feet away without damaging or dropping them.

MATERIALS IN KIT

  • Scissors
  • Electrical Tape
  • ~3 feet of cotton twine
  • 10 rubber bands
  • 4 binder clips
  • 4 straws
  • 4 pipe cleaners
  • 5 jumbo popsicle sticks
  • 2 hair ties
  • 6 large fasteners

PROTOTYPE

Prototype is a term we will use often, so what does it mean? One way to think of a prototype is a rough draft on a paper. Here are two videos that explain a prototype in engineering.

https://youtu.be/_1bOaNSy5XY
https://youtu.be/k_9Q-KDSb9o

STEP 1—RESEARCH

Did you know engineers design robotic grabber arms for individuals who are not able to use their arms to pick up objects or for garbage trucks to pick up garbage bins? How do they do that?

As a family, search for news stories and videos using such phrases as “engineers that develop robotic arms”, “mechanical arm for garbage truck”, or “robotic hand for humans.” Here is one video to get you started.

https://youtu.be/WxCDZquT2Yk

Take notes on what you notice about the design of the arms and/or hands.

MATERIALS IN YOUR HOME—SCAVENGER HUNT

Now you need materials for the “body” of the grabber. As a family, find items around your house that start with the letters below. Only one object per letter, but you can have more than one of that object. For example, for the letter P, you can use 5 plastic bottles. Be strategic. We suggest recyclable materials.

B D E H L N P S T W

STEP 2—PLAN

Who is your user? What do you want your grabber to grab? Think about at least 3 items in your home and consider the texture, size, weight, and shape of the objects.

Next, using your research notes, draw 3 different designs of grabbers. For each design, list or label the materials you will use. You can only use the materials in the kit and from the scavenger hunt.

STEP 3—CREATE

Pick one of your designs from Step 2 and a prototype. What is an appropriate name for your grabber? Think about the purpose of the grabber.

STEP 4—TEST

Use your grabber to pick up three items in your home from at least two feet away. Since your grabber may be long, make sure you test in a space that has plenty of room. You don’t want to accidentally hit other or knock things over!! Don’t lift breakable items or any hot/dangerous objects.

STEP 5—IMPROVE

How well did your grabber pick up three items in your home from at least two feet away?

  1. Can others in your family use the grabber?
  2. What improvements might be made? Why do
    you think this?
    Make any changes and test your grabber again.
    Continue to test and redesign until you are happy
    with your grabber.

STEP 6—PARALLEL PROTOTYPE

Try another design from Step 2. Do each step again—Create, Test, and Improve.

STEP 6—CHALLENGES

We also have a few challenges for you to consider:

  • How many different types of items can one of your grabbers pick up? What do these items have in common?
  • Design a grabber that can hand someone a water bottle across the room while you are both sitting.
  • Combine elements of your three designs from Step 2 into a mega-grabber.
  • Make up your own challenge. Don’t forget to start with planning your design.

DID YOU KNOW?

Different types of engineers are needed to plan, create, test, and improve robots including robotic arms—mechanical engineers work on the body, electrical engineers work on the nervous system or the electrical components (e.g., circuits), and computer science engineers work on the brain or the computer program that tells the robot what to do. If you are interested in learning more, check out this video.

Mint Mobile

DID YOU KNOW…?

A car that is energy efficient can travel farther on the same amount of gas, which saves the driver money and decreases air pollution. Also, gasoline is made from oil, which is a non-renewable energy source. This means that when it is used up, no more is available. For these reasons, engineers are continually figuring out ways to make cars more energy efficient. Aerodynamics is one example (see https://youtu.be/AXjiThF1LXU for more information.)

ENGINEERING TASK

The automobile company, Rolls-Royce, has produced many cars that are considered of poor fuel efficiency by the United States Department of Energy. Similar to automotive engineers, your task is to build a prototype to test the effect of different variables to report recommendations to the company. The prototype should travel along a straight path down a ramp and travel as far as possible with a minimum of 8 feet.

VARIABLES

What are variables you might ask? Let’s explore this with an interactive video that uses MythBuster experiments to explain.

MATERIALS IN KIT

  • 12 Lifesavers Mints (individually wrapped)
    10 index cards
  • 8 straws
  • 8 toothpicks
  • 20 popsicle sticks
  • Masking tape
  • Scissors
  • Tape measure
  • 30 pennies
  • Items around your home

STEP 1—RESEARCH

What can we learn from others? Let’s watch a few videos to find out. Stop the videos as needed to take notes on what you notice that you might include in your own designs.

https://youtu.be/rVVB0-6Zgq0
https://youtu.be/SW9lBhgh5SE
https://youtu.be/KMUncKor7FY

STEP 2—PLAN

Brainstorm and sketch 2-3 car designs. For each, make a list of materials and you can only use material from the kit in your design. How do you think the body of the car will make a difference?

STEP 3—CREATE

Pick one of your designs from Step 2 and build your car prototype. But wait? How are you going to test your prototype? We need a ramp! Determine a location inside or outside your home to test the prototype. Construct a ramp using material from your home environment. How will you secure the ramp?

Does your ramp need support?

STEP 4—PILOT TEST & IMPROVE

Let’s test your prototype by sending it down the ramp 3 times. What did you notice? How far did it travel? Did it travel in a straight line? What can be improved? How is this based on your observations? Make these changes to your prototype. Keep testing and redesigning the prototype until you are satisfied.

STEP 5—TEST #1

Let’s test how weight changes the distance traveled by adding or removing pennies each trial. How many trials? At least six. In this test, what is the independent variable and the dependent variable? Let’s keep track of our test through a table.

Trial ## of penniesDistance traveled
1
2

DID YOU KNOW…?

Pennies weigh different amounts depending on the year the penny was made. Pennies made before 1982 are made of 95% copper and 5% zinc. A copper penny weighs 3.11 grams or 0.109702 ounces. Pennies made in the year of 1982 and after are made of 97.5% zinc and 2.5% copper. A zinc penny weighs 2.5 grams or 0.0881849 ounces.
(coincollectingenterprise.com)

STEP 6—TEST #2

Let’s conduct a new test on how the number of wheels change the distance traveled. Make a prediction about what you think will happen to the distance the car will travel based on changes to the wheels. How many trials? At least three. Let’s keep track of our test through a table.

Trial ## of wheelsDistance traveled
1
2

ADDITIONAL TESTS

There are additional variables that you can consider before making recommendations to Rolls Royce. As an engineer, remember to document your test(s).

  • Change the size of the wheel using objects in your home.
  • Texture of the wheel. Wrap the wheel with material in your home (e.g., aluminum foil).
  • Position and balance of the wheels.

PARALLEL PROTOTYPING

How do you think the body of the car might change your results? Choose another design from Step 2 and replicate or copy your tests. How are your results similar and/or different? For example, might the size of the prototype make a difference (e.g., large truck versus a small sports car)? Support using evidence from your charts and your observations as an engineer.

STEP 7—COMMUNICATE

Based on the results from your tests, what recommendations would you make to Rolls Royce regarding changes they should make to increase their fuel efficiency ratings? Support using evidence from your charts and your observations as an engineer.

DID YOU KNOW…?

  • The first engine powered car was built in Mannheim, Germany by Karl Benz in 1885. Between 1888 and 1893 they sold a whopping 25 units.
  • On average, every American will spend approximately two whole weeks of their life stopped at red lights.
  • The first speeding ticket ever issued was in 1902, when most cars could barely reach 45mph.
  • In 1939 the San Antonio Light wrote about future cars that could be folded into a neat and tidy suitcase-sized package. Got that one a little wrong.

For more interesting facts about automotive engineers, check out https://automotive-engineering.weebly.com/index.html

DID YOU ALSO KNOW…?

Mechanical engineers can work in various industries—manufacturing, aeronautics, robotics, oh, and yes, automobiles—as they have an understanding of how machines work. Mechanical engineers are part of a team that designs, tests, and improves parts of a car to pass safety standards. Henry Ford, Karl Benz, and Nikola Tesla were mechanical engineers and known for revolutionizing the automobile industry

Rain Gauge

ENGINEERING TASK

Several cities across the U.S. are experiencing their wettest year-to-date. The National Weather Service is asking for your help in measuring and reporting the amount of rainfall in your city. Using the provided material, build a rain gauge to measure the amount of liquid precipitation over a set period of time.

MATERIALS IN KIT

  • 2 AA batteries
  • 1 Battery holder
  • 5-6 LED lights
  • Electrical Tape
  • 2 Alligator clips with wires
  • 2 Aluminum foil sheets
  • 3-4 Paperclips
  • Hot glue gun & stick
  • 2-3 12-oz. Plastic cups
  • 4-5 Binder clips
  • 2-3 Thumb tacks
  • 1 Ruler
  • 1 Black Sharpie

STEP 1—RESEARCH

What is a rain gauge? How does it work? How is a rain gauge used by meteorologists (or weather forecasters) and hydrologists (or scientists that research the earth’s underground and surface water)? Here are a few videos to get you started and don’t forget to take notes:

https://youtu.be/7gY-GWtmGFI
https://youtu.be/VYWbC61C1cA

Where have you seen a rain gauge?

STEP 1—RESEARCH

What is unique and rather cool about your rain gauge is that it will light up. So let’s take a look at what is known as a simple circuit. Describe what you notice.

STEP 2—EXPLORE

Using some of the materials in the kit, including the battery pack and LED lights, can you create a simple circuit? Can you find more than one way to do this—using different materials in the kit? What materials might be around your home that you can use as conductive material for a simple circuit? Test it out. Also, the legs of the LED lights are different. Which one is positive and which one is negative? How do you know?

STEP 3—CREATE

Discuss the measurement you will use to measure the rain fall. Millimeters? Centimeters? Inches? Take a plastic cup. Use the ruler to measure the vertical distance or the amount rain fall. Use the sharpie to mark this distance and add your units (e.g., cm, mm, inches) just like you saw in the videos. We will call this your vertical ruler.

STEP 3—CREATE

Using a thumb tack, poke a hole into your cup—one hole at each mark along your vertical ruler. Insert the longest leg (i.e., positive) of a LED light into each hole. Leave the other leg (i.e., negative) on the outside of the cup. Use hot glue to secure the LED lights and fill the holes. Watch this time lapse video for support: https://youtu.be/MRv1VsA7RBM

STEP 3—CREATE

Take an aluminum foil sheet and wrap around the legs of the LED lights on the outside of the cup. Why are we using aluminum foil?

STEP 3—CREATE

Straighten one paper clip and insert into the bottom of the cup. Part of the paper clip should be inside the cup, while the other part should be outside the cup. You will use the thumb tack and the hot glue as you did when you inserted the LED lights into the cup.

STEP 3—CREATE

Look closely at the image, particularly the alligator clips. What do you notice? Which connection is positive and which connection is negative? How do you know? Think back to your research.

STEP 4—TEST

Now it’s time to complete your circuit by pouring tap water into the cup. (Psst. Did you know pure water is a very poor conductor? But tap water, like rain water, contains charged ions that allow electricity to flow through.)

STEP 5—IMPROVE

Engineers often build and improve upon their prototypes before launching a final product. If it did not work properly, troubleshoot by walking through your steps again and thinking out loud with other family members. How will you redesign the prototype? What improvements might you make to the rain gauge? Explain your thinking.

EXTENSIONS

  1. Using items around your home, plan and build something to cover the battery pack. This cover should uphold the elements of weather. Why is it important to cover the battery pack of the rain gauge from the elements of weather?
  2. What might you add to the rain gauge to make sure that it does not blow over or blow away once set outside? Do some research, make a plan, and add on to your rain gauge.

PARALLEL PROTOTYPING

Now that you have an idea of how to create a rain gauge using the material from the kit, we challenge you to re-create another rain gauge. Keep in mind the process —plan, create, test, and improve. We challenge you to think outside the “kit” and use material in your home.

DID YOU KNOW…?

Atmospheric scientists study and predict the weather and climate and its impact on our lives. Many have degrees in atmospheric science, physics, chemistry, or mathematics. Job opportunities for atmospheric scientists are expected to grow 12% by 2026. If you are interested, this video show how people work together on an atmospheric science project—https://youtu.be/Fk-uqrXkkG8

Environmental engineers develop solutions to improve recycling, public health, and water and air pollution. Environmental engineers should have a strong science and math background, work well with others, and be imaginative. Check out https://youtu.be/k2epvAUEdCI for more information.

Rollercoaster

ENGINEERING TASK

A local amusement park has asked you to design their next roller coaster. You decide to design a prototype suitable for a marble to travel from the start to the finish. You will use the prototype during your presentation to the local amusement park.

MATERIALS IN KIT

  • Multiple strips of cardstock paper
  • Scissors
  • Tape
  • Marble
  • Other household objects

DID YOU KNOW?

Engineers design and work on a team to build theme park rides and attractions that are safe, yet fun for guests like you. Engineers at Walt Disney World in Orlando, Florida make between $67,000 and $110,000 a year.

About how many Mickey Mouse hats ($30) could you buy if you made $67,000 a year?

STEP 1—RESEARCH

We encourage you to research roller coasters for inspiration. Most have a theme—Space Mountain and the Incredible Hulk are two examples. Write down things you notice during your research.

STEP 2—PLAN

Let’s think through the following for your design. Don’t forget to take notes.

  1. What is the theme of your roller coaster? Why?
    What artistic element might you add?
  2. How tall? How long?
  3. How many turns, curves, and/or loops, if any?
  4. How will you support the structure?

STEP 2—PLAN

Now that you have some general design features written down, draw a sketch.

Describe your process for creating your prototype. What is the first step?

STEP 3

CREATE roller coaster tracks and BUILD on a flat surface!

STEP 3—CREATE & BUILD FOLDING TECHNIQUE—TRACK

Take 1 strip of paper and fold into thirds. To join tracks, overlap one end of a track to the end of another track. Use tape to attach the two tracks.

STEP 3—CREATE & BUILD FOLDING TECHNIQUE—LOOP, CURVE, HILL, AND MORE

Take 1 strip of paper and fold into thirds. Cut slits of on both sides—not the track. The slits can be of any size, but should be similar or consistent. Fold as desired and use tape as needed.

STEP 3—CREATE & BUILD FOLDING TECHNIQUE

STEP 3—CREATE & BUILD FOLDING TECHNIQUE

STEP 3—CREATE & BUILD FOLDING TECHNIQUE

STEP 3—CREATE

DESIGN YOUR OWN FOLDING TECHNIQUE

Create your own folding technique or design to add to your roller coaster.

STEP 3—CREATE & BUILD FOLDING TECHNIQUE—SUPPORT

Take 1 strip of paper and fold into fourths length-wise. Make a triangular prism by overlapping two of the fourths.

STEP 3—CREATE & BUILD FOLDING TECHNIQUE—SUPPORT

You can also make a rectangular prism using 2 strips of paper and folding both into fourths. Which support—triangular prism or rectangular prism—will provide more stability? Why?

STEP 3—CREATE & BUILD FOLDING TECHNIQUE—SUPPORT

What do you notice about securing the supports to a base (e.g., table, cardboard)? Why is this an important step?

STEP 4—TEST & IMPROVE

Pause! For each test or trial, write down what happened or ask a parent/caregiver to write this information down. What went well or not so well? What did you change based on your observations? Remember the marble is to travel from the beginning to the end multiple times.

STEP 4—EXTENSION

How might the failures during testing be based on physics?

DID YOU KNOW…

The first roller coaster in America opened at Coney Island in Brooklyn, New York on June 16, 1884. It traveled approximately six miles per hour and cost a nickel to ride.

Kingda Ka is one of the world’s tallest (456 feet) and fastest (128 miles per hour) roller coasters. Yet, it may be one of the shortest at 50.6 seconds.

The longest roller coaster is the Steel Dragon 2000 at 8,000 feet long. The duration of the ride is 4:00 minutes.

IF YOU ARE INTERESTED…

Do more research about roller coasters around the world.

  1. What rollercoaster has the most loops? How many? What country is it located?
  2. Are you more likely to get injured from falling off a bed or riding a roller coaster? Explain.
  3. Where is the fastest rollercoaster in the world? How fast does it travel?
  4. Why are there height restrictions on who can ride roller coasters?
  5. True or False: Four men rode 74 rollercoasters in 10 theme parks in just one day.

Soccer Bot

ENGINEERING TASK

You have been asked by a popular game company to develop handheld soccer bots for a new indoor game for two players. A soccer bot is a robot that plays soccer. For this game, players score goals by hitting a small ball into the opposing “net”. (Psst. You are Player 1. Who is Player 2?) Check out this video to see the game being played: https://youtu.be/9NViVG80CHI

DID YOU KNOW…?

Engineers play an important role in sports, specifically in the design of equipment (e.g., badminton rackets, shin guards, baseball bats) and attire (e.g., swimsuits, socks). Here is a video to learn more:

https://youtu.be/r3FUMwA1ahY?t=105

The next time you play your favorite sport, think about how an engineer might have been involved in designing the equipment you are using!

MATERIALS IN KIT

Each player will have the following:

  • 1 Motor
  • 1 AA battery
  • 1 Battery holder
  • 1 Push button switch
  • 1 Sheet of cardstock
  • 10 Popsicle sticks
  • 5 Rubber bands
  • 2 Binder clips

Two players will share:

  • Electrical tape
  • 1 Ping Pong ball
  • Hot glue gun
  • 2 Hot glue sticks

STEP 1—RESEARCH

What comes to mind when you hear “research”? As an engineer, sometimes research includes examining products that already exist. On the following pages, we have included images of soccer bots for you to “research.”

  • What are the key characteristics of the soccer bots?
  • What materials are used? How are the material used?
  • How do you think the soccer bot works?
  • Where might the soccer bot player place their hand?

STEP 2—PLAN

Sketch 2-3 different designs of soccer bots and make a list of material for each design. How are your designs based on your research? What new characteristics did you include in your designs?

STEP 3—EXPLORE

Let’s explore! Use what you learned from the previous low-tech kit to test your motor.

  • Explain how to connect the battery pack to the motor. How would you explain this someone six-years old?
  • What kind of motion does the motor create? How can you use this motion to kick a ball?
  • Now let’s think about the button switch. What do you think is the purpose of the switch? How might you include the switch into your simple circuit?

STEP 4—CREATE

Pick one of your designs from Step 2 and build the soccer bot. You can only use materials in the kit or anything around your home. This video shows how to connect arms to the motor—

https://youtu.be/yjnzAJgES2M

How is your prototype different from Player 2?

STEP 5—PREPARE THE SOCCER FIELD

Use electrical tape to mark the position of the midfield and place the two nets at the end. How far apart will you make the two nets? How did you make this decision? How will prevent the ball from flying across the room?

STEP 5—PREPARE THE SOCCER FIELD

Design a net for the bot to “kick” a ping pong ball through. How big should the net be?

BE CREATIVE!

STEP 6—TEST & IMPROVE (EACH PLAYER)

Use your soccer bot to kick a ping pong ball from one net to the other (see https://youtu.be/d4ab_09rIjs for an example).

  • Is your bot able to kick the ball into the opposite net? Why or why not?
  • Did the ball roll straight? Does that matter? Explain.
  • What changes may be needed? Why?

Make any changes and continue to test your bot until you are satisfied with how the bot kicks the ball.

SOCCER BOT GAME RULES

Watch this video for the first two rules
https://youtu.be/9S23TBfa9j0

  1. Only the bots’ “arms” can touch the ball.
  2. Players can hold and pass the ball, but not swing the bot to hit the ball.
  3. Players score goals by hitting a ball into the opposing net with the handheld soccer bot.
  4. Game play starts with the ball at the midfield.
  5. The first play to score 5 goals wins.

STEP 7

STEP 8—REDESIGN

Is your bot able to kick the ball into the opposite net when another player is pre-sent? What improvements might be made? Why do you think this? Make any changes and test your bot again through playing the game. (Psst. The soccer bot can have multiple arms.)

STEP 9—GAME RULES

The game company would like for you to develop additional games that can be played with the handheld soccer bots. Develop at least one new game with different rules from the one you just played. Is this game fair? Be sure to test the game. Would you change the rules after playing the game? Explain.

DID YOU KNOW…?

Sports engineering is a newer engineering field. They are concerned with the research and development of technologies for the sports industry—equipment and environment. A common trait of sports engineers are their love for sports and passion for science and technology. Many sports engineers have a background as a mechanical or materials engineer. Sports engineers earn about $53.98 per hour. How much do they earn in a year?

Toy Hack

ENGINEERING TASK

You have been asked by a toy refurbish shop to brainstorm ways to give old toys a second life using electronic parts. Make a prototype that renovates, redesigns, and/or remixes an old toy. The prototype should change the look and feel of the toy, or the toy’s role in our life, using new materials.

WHICH OF THESE TOYS ARE YOU FAMILIAR WITH?

MATERIALS IN KIT

  • 2 AA batteries
  • 1 battery holder
  • 5 LED lights
  • 1 motor
  • 1 buzzer
  • 2 wires (~12 inches)
  • Tape
  • ~10 Velcro dots
  • Scissors
  • Hot glue gun & sticks
  • Phillips head screwdriver
  • Assorted craft materials

PROTOTYPE

Prototype is a term we will use often, so what does it mean? One way to think of a prototype is a rough draft on a paper. Here are two videos that explain a prototype in engineering.

https://youtu.be/_1bOaNSy5XY
https://youtu.be/k_9Q-KDSb9o

STEP 1—RESEARCH

How have others hacked and repurposed toys? Let’s watch a video to find out.

https://youtu.be/FP6R_YW2VPk

Engineers take notes to use in their design thinking. You can organize your notes into two columns.

I NOTICED…I WONDER ABOUT…

STEP 2—PLAN

Let’s start with one toy. This can be the toy we provided or an old toy you no longer play with.

Explore the toy using your four senses (vision, smell, touch, hearing). What can you do to change the look, feel, smell, or sound of the toy?

We have questions on the next page for you to discuss and brainstorm together as a family. Keep taking notes!!!! And feel free to ask someone else to take notes for you.

STEP 2—PLAN

  1. What does the toy do? What role does it play in your life? What can you do to give it a new role?
  2. Who is this toy designed for? What can you do to make it useful for other people?
  3. What context does the toy belong? What can you do to make the toy appropriate for another context? For example, think about a setting for a dinosaur. How might your hack the dinosaur to be something used in the bathroom? (Psst. A toothbrush holder.)
  4. Can you take apart or disassemble the toy (with the permission of your caregiver)? How might this be done?

STEP 2—PLAN

Hum? How will you give the old toy a second life using electronic parts? How might you use the LED lights, the motor, or the buzzer (beyond making your family crazy)? Let’s explore! Place the AA batteries in the battery pack. How does the motor need to be connected to work? What about the buzzer? And the LED lights?

STEP 2—PLAN

One more thing…take some time to think about and discuss ALL your notes, explorations, and ideas. Write down and/or draw out your final plan for how you will give the toy a new life. What materials will you use? You can use materials in the kit or in your home.

DID YOU KNOW…?

People who design products explore many materials to get insights into its possible use— its proper-ties, how it can be manipulated (e.g., twisted), and how it feels.

Karana, Giaccardi, Stamhuis, & Goossensen (2016)

STEP 3—CREATE

It is time to refurbish the toy—give it a new and different use for others to enjoy.

The transformation of a baby toy to a lantern.

STEP 3—TEST

Interview 2-3 people about your new toy.

  1. How might you use this toy? What do you think the toy does?
  2. Where and when would we use it?
  3. What kind of emotion does this toy spark? Why?

STEP 4—IMPROVE

  • What were other people’s reactions towards
  • your new toy? Were their responses in agreement with your design intentions? Why or why not?
  • What changes can you make to the new toy based on what you learned from the interviews?

Continue to re-create and re-mix the new toy based on the feedback.

DID YOU KNOW…?

You just acted like as a product engineer. Product designers and engineers use usability testing to collect data and determine the participant’s satisfaction with the product. Did you not put your product in front of potential users, walk them through your product, and collect feedback from them to improve your product? The shop keeper thinks so!!! https://youtu.be/BrVnBdW6_rE

Trendy Tennies

ENGINEERING TASK

You have been asked by a popular shoe company to design a new trendy tennis shoe for unique needs of their four customers. Pick one of the customers and design a tennis shoe to meet their needs. You decide to use everyday products to construct the tennis shoe prototype.

CUSTOMER 1—OLAF

Age: 3 (Frozen 2)
Shoe size: Kid’s 3
About: Olaf has a layer of permafrost to keep him from melting. He enjoys riding Sven and hanging out with Else in Arendelle.

CUSTOMER 2—SERENA WILLIAMS

Age: 39
Shoe size: Women’s 10.5
About: Serena is an American professional tennis player and has won 23 Grand Slam singles titles.

CUSTOMER 3—HULK/BRUCE BANNER

Age: 49
Shoe size: Unknown; feet change sizes
About: Bruce is a brilliant scientist. As Hulk, he has unlimited superhuman power, can leap great distances, and can heal injuries within seconds.

CUSTOMER 4—TONY HAWK

Age: 42
Shoe size: Men’s 8.5
About: Tony is a famous skateboarder who was the first person to land the 900, a trick where he spins 2.5 times on a board.

MATERIALS IN KIT

  • ~20 Cotton balls
  • 3-4 Sheets of White Cardstock
  • 3 rolls of ribbon (different colors)
  • Pieces of Fabric and/or Felt
  • ~20 Velcro dots
  • 3-4 Sheets of Sandpaper
  • Tape
  • Pair of Scissors
  • White Glue
  • Hole puncher
  • ~10 Pipe cleaners
  • ~2-3 Foam sheets
  • 3-4 Markers

We also encourage you to use materials and tools in and/or around your home environment.

PROTOTYPE

Prototype is a term we will use often, so what does it mean? One way to think of a prototype is a rough draft on a paper. Here are two videos that explain a prototype in engineering.

https://youtu.be/_1bOaNSy5XY
https://youtu.be/k_9Q-KDSb9o

STEP 1—RESEARCH

Let’s do research on the customer or user you selected as we want to design an appropriate shoe. As you search and find interesting things about your customer, be sure to write them down.

Next think about how you will use the information about your customer in the design of the shoe. For example, what is the intended purpose (e.g., running)? How will you make your prototype uniquely stylish, a one-of-a-kind design?

STEP 1—RESEARCH

Below is another place to learn more about the design of the shoe such as the thickness of the sole or bottom of the shoe.

https://naturalfootgear.com/blogs/educational-articles/problematic-shoe-design-features

Additional shoe design elements for you to research may include (a) flexibility, (b) traction, and (c) ankle support.

STEP 2—PLAN

On a sheet of paper, sketch your shoe design and list the material you will use for your prototype shoe. You are free to use the material in the kit and/or material in your home.

It is okay to ask others to also sketch a design.

STEP 3—TRACE

Trace someone’s foot to use in your design. Next, estimate the length of the foot print in inches.

STEP 4

Create and test your prototype.

STEP 5—IMPROVE

How would your customer rate your prototype?

Based on your customer and your research, what changes and/or additions might you make to improve your prototype? Explain why. Continue to redesign the prototype until you get a 5-star rating.

DID YOU KNOW?

Biomechanical engineers are involved in designing shoes and other products such as backpacks and child safety car seats. They must understand the mechanics of how our bodies move to design products that are comfortable, safe, and enhance human performance. Check out https://youtu.be/Pu0lp7apU1Y

Water Color Bot

ENGINEERING TASK

Design a motorized bot that “paints.”
Example: https://youtu.be/mapCDTTKZI8

DID YOU KNOW?

There are jobs in which people create robots—robotic engineers. In 2019, robotic engineers in
the United States made an average salary of $99,040 a year. They also like their jobs. They rated their career happiness 4.2 out of 5 stars.

Watch the following videos to learn more.

MATERIALS IN KIT

  • ~25 Q-tips
  • ~15 cotton balls
  • ~15 rubber bands
  • 2 cell batteries
  • 2 vibrating motors
  • Clear tape
  • Water color kit
  • Sheets of paper, cereal box, and aluminum foil

You will need a small amount of water.


STEP 1—RESEARCH

Watch the following video. This video shows examples of previous water color bot designs.

https://youtu.be/NmOAUy1G3n8

Stop the video as needed to take notes on what you notice that you might work into your own designs.

STEP 2—PLAN

Based on the video and your notes, design/sketch 3-4 bots and make a list of materials for each design. What makes each of your designs unique?

STEP 3—CREATE

Pick one of your designs from Step 2. Build the frame or body of your bot using Q-tips cotton balls, rubber bands and/or tape.

How does the battery connect to the motor? Where is a reasonable place to attach the battery and motor?


STEP 4—TEST

Try different material as your canvas—paper, empty food boxes (e.g., cereal), and aluminum foil. What other material in your home might you use? Predict which material will work best. Why?

Lightly dip the end of each Q-tip into the water color of your choosing. Time to let you water color bot PAINT! Don’t forget to try the different canvases.


STEP 5—IMPROVE

Are changes needed to the bot? Why or why not? if so, what might you do differently? If not, what worked well?


STEP 6—PARALLEL PROTOTYPE

  • Try additional designs from Step 1. Do each step again—Build, Test, and Improve if needed. We also have a few challenges for you to consider:
  • no cotton balls.
  • no tape.
  • use other household objects.
  • change the location of the battery and motor to see how it impacts the artwork.


DID YOU KNOW?

There are individuals who are programming (or teaching) robots to paint.